Orthographic Images
Start with a 3D selection box containing point clouds/mesh models, as for cropping, but create 2D orthographic images of all visible parts visible from each face, with scale details. They are raster (not vector) images, so cannot be edited in PointFuse, though you can display them, one per tab.
- Open a project and display the point clouds/mesh models.
- Click Ortho Images
 .
. - You see a selection box, with each face labeled: Front, Top etc.
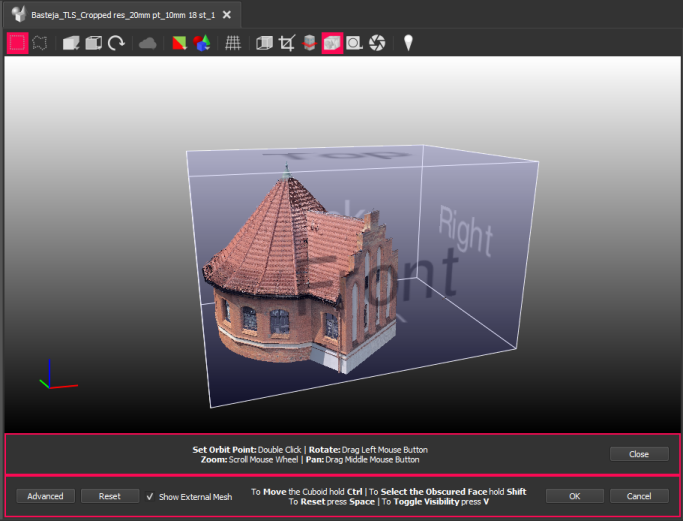
- Adjust the selection in the viewport or click Advanced to change the X, Y, and Z values directly. See Selection Tools, Controls, and Output. You can check and uncheck Show External Mesh to toggle visibility of data outside the selection box.
- Click OK to open the Ortho Images dialog:
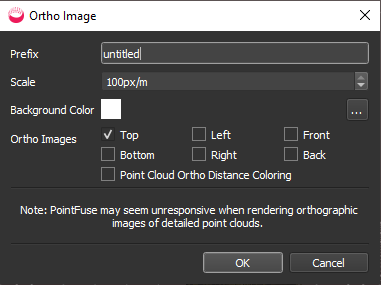
- Specify a Prefix (name) for the ortho images. Each will have the face name appended.
- Adjust the Scale of pixels per meter (default is 100).
- Select a Background Color.
- Check which faces you want Ortho Images of.
- Optionally check Point Cloud Ortho Distance Coloring to shade the point cloud according to the distance from the camera.
- Click OK.
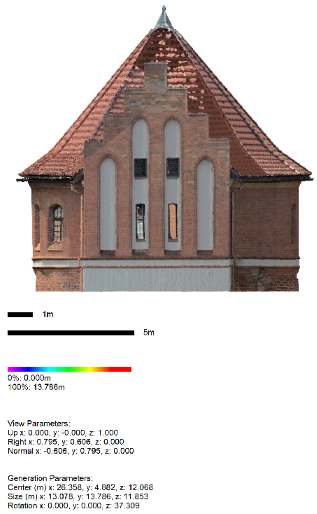
- The orthographic images are added to the Ortho Images folder. This can take a while for large point clouds. The ortho images have the name you specified, appended with the name of the face in brackets, e.g. church tower (Front).
- View the ortho images, with scale and other parameters. For example:
|
|
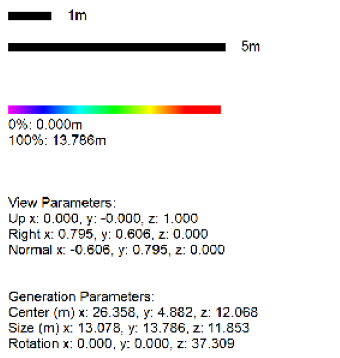
Enlarged view of scale etc:
|
The grid, projection and camera settings are automatically switched off when viewing ortho images (and other 2D data).